Paint-staining… Yes, it is my own word!
Welcome to DIY Gringa in Mexico… a truly DIY project if ever there was one.
This is my step by step guide to paint-staining concrete floors. But first, let me give you a little background information so you will know whether this job is for you:
- I am a single (engaged) gringa living in Ixtapaluca Mexico (as a missionary)
- I use public transportation and friends to run errands
- I speak very little Spanish
- Product instructions are all in Spanish
- Things are not as easy to get here in Mexico as they are in the states
Another thing to note is that when it comes to DIY projects, I am not picky. I like to do trial and error, and I use what is available (rarely buying special tools…I mean really, if I have to do that…I’m gonna hire someone to do it for me). Now, if I pay someone to do it, then I become very picky… politely so, but I want it done right if I am plunking out the bucks to get it done.
Also, durability is not my main focus on these “Gringa in Mexico” projects, because my stay here is for one year. I chose availability of product and ease of use over durability. But I will update this post as time passes to let you know how well it holds up.

So here we go…
Ok. Everything here is pretty much made out of concrete. The walls. The floors. The patio. Almost everything. Some of my friends have put tile on their floors, but I have a very limited budget and am renting… so I really didn’t want to spend much money there.
I have been eyeballing all of the stained concrete projects on Pinterest and wanting to give it a try. But they all look so complicated. And, I really didn’t want to use the oil-based type products because they are just way too much trouble to clean up. If I were doing this in a home I owned, then I probably would use the more durable oil-based products. So, everything you see me using here is water based. With the exception of the stain…because I could not find any water based here.
What you need (well, what I used… you may want to use different products, I am NOT an expert!)
- Water-based paint (at least 2 colors, I used 3, counting the base coat that probably wasn’t necessary; use any latex interior paint or chalk style paint)
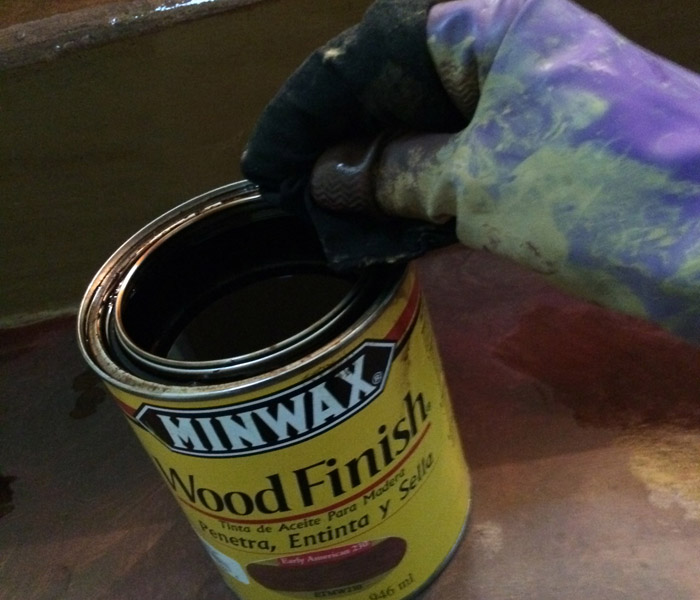
- Stain (I used wood stain because that was what I could find, but you’ll want an oil-based stain in a color that works with your decor)
- Sealer (I was pretty stoked when I found a water based sealer for concrete, I had almost given up; this sealer is very similar)
- Paint brush (for edges)
- Lint free rag(s)
- Sponges (2)
- Panty hose (yes, the kind women wear)
- Small Pan
- Rubber Gloves

Base Paint
First, I painted the stairs a tan/yellow color. At that point, I wasn’t quite sure what I was going to do, so I am not sure this step is necessary (except I ended up leaving the vertical parts that color).
Colors
Next, I decided I wanted a rich look to contrast the walls. The blue wall you see above is not going to stay that way… I hope to paint a mural there. In light of that, I didn’t use tape to protect that area, so you may want to add that to your list of things to do if you have areas that need protecting.
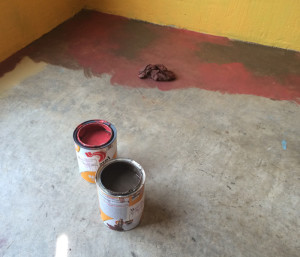
Back on track… I chose brown and a dark red color.
Start Painting
Just start painting. I used the two colors simultaneously so they would blend well. For this look, you really don’t want one to dry before the other. I also added water in some areas to keep it from looking too uniform (I kept a small pan with water in it next to the paint for easy access).
Start around the edges with an angled brush, being careful not to contaminate areas you don’t want painted (or use tape to protect it… I am going to paint that wall, so I didn’t bother). Then fill in the rest using a mechanic’s rag (or something that doesn’t have lint in it), alternating and blending colors. I did it straight from the can (because I’m lazy), but you can put it in bowls if you want.


Let It Dry
Is it wrong that when I typed that subtitle, all I could think was “Let it go… Let it go” (too much Disney). But I digress. You should probably let the paint dry overnight, but I was in a rush… so I let it dry about two hours. Painting with a rag makes a pretty thin coating, and the air in Ixtapaluca (near Mexico City) is pretty dry at this altitude (2,260 m or 7,410 ft). That is higher than Denver! So there, you have my reasoning for moving on.
Stain It
This is where I used the panty hose. I’m not sure why this works, but it was recommended somewhere in cyberspace… so I tried it. Works fine. I applied it all over the steps, even the vertical part that I left the solid paint color. Try to apply it evenly and don’t leave any puddles. It isn’t going to soak in like it does on wood. It just gives it a rich luster and a slight sheen.

Let It Dry… Again
This is where I figured out that doing stairs can be tricky. The stain was the longest step to dry. I started at the top and worked my way down. While admiring the shiny glow of the wet stain, I am downing a very large bottle of water. Then I realized I had left the lid to the stain at the top of the stairs. Oh well, no big deal. It can wait. And wait. And wait. Then, the water took its toll. I have one bathroom… and you guessed it! It is upstairs! Poor planning for sure!
It finally dried enough for me to tippee-toe upstairs and retire for the evening. It needed to dry over night anyway.
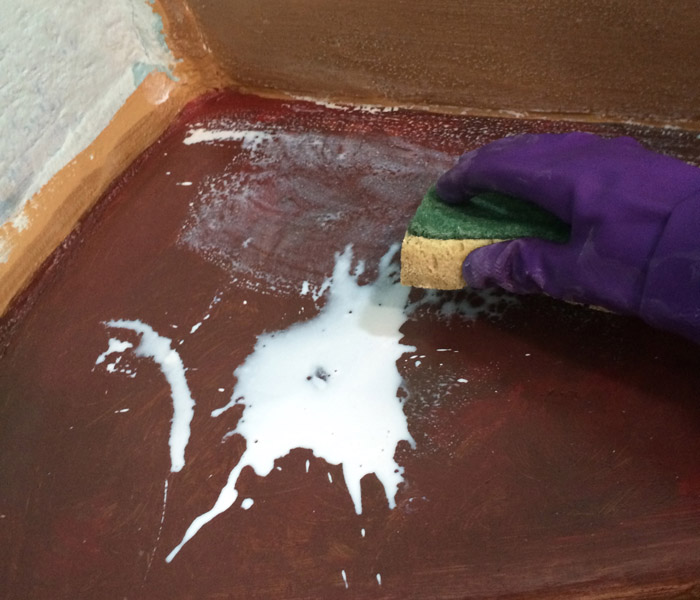
Now the Sealer
This was the step I was dreading the most. I’m not sure why. It was the easiest step of all. And the quickest drying! I started at the top of the stairs, applying the product evenly, then smoothing, or “feathering” it with the second sponge to remove puddles and streaks before going down to the next step. I actually did two steps at a time. Any more than that and I wouldn’t be able to reach them to do the “feathering”.
Then I let it dry. The bottle said at least 30 minutes (I think), but I had other stuff to do so I waited a couple of hours. But it was completely dry. Then I applied the second coat. I think a third coat might be good, but I was “done” by this time and decided it looked fine.
Click image to enlarge.


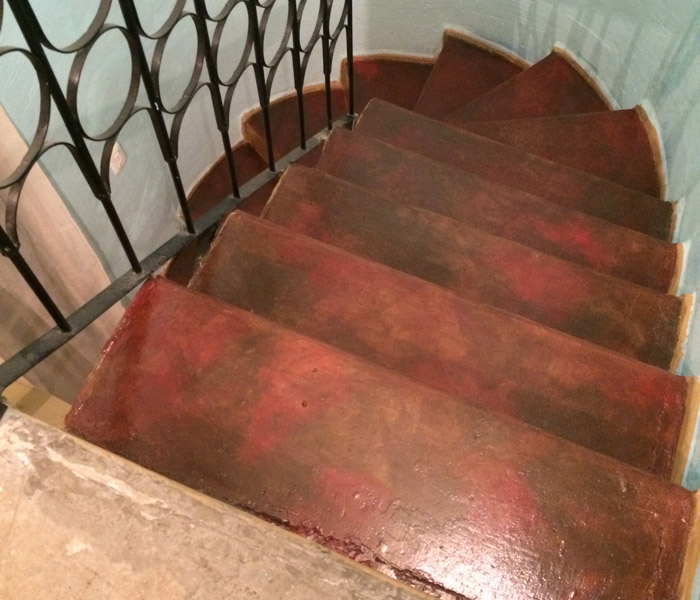
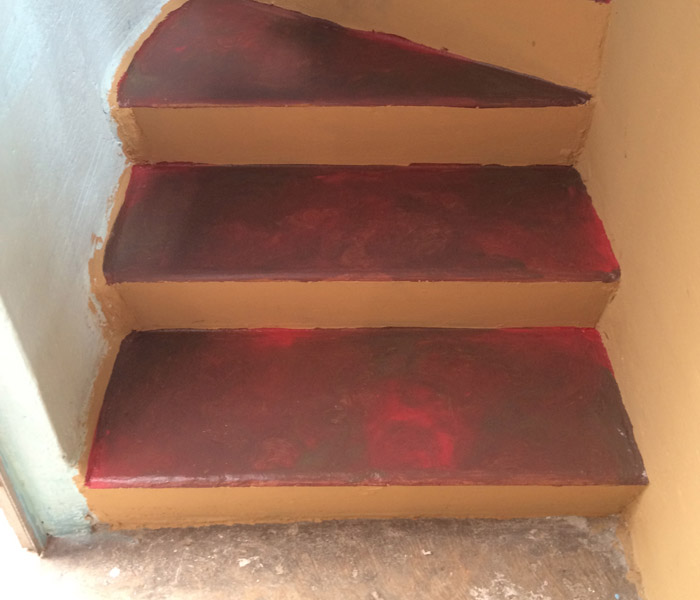
Finished!
So there you go! My first Gringa in Mexico DIY Project! I plan on doing the rest of my floors the same way. I just have to do it in stages because I have to live in the house with two dogs and I can’t have the entire house full of floors “wet” at the same time.
Thanks for reading, I hope you will check out the rest of my blog.
I also did this on my living room and kitchen floors. Check out that post here.
UPDATE
2 months: stairs are still looking good! Dogs (and me) running up and down don’t seem to phase it.